
linux for ai development
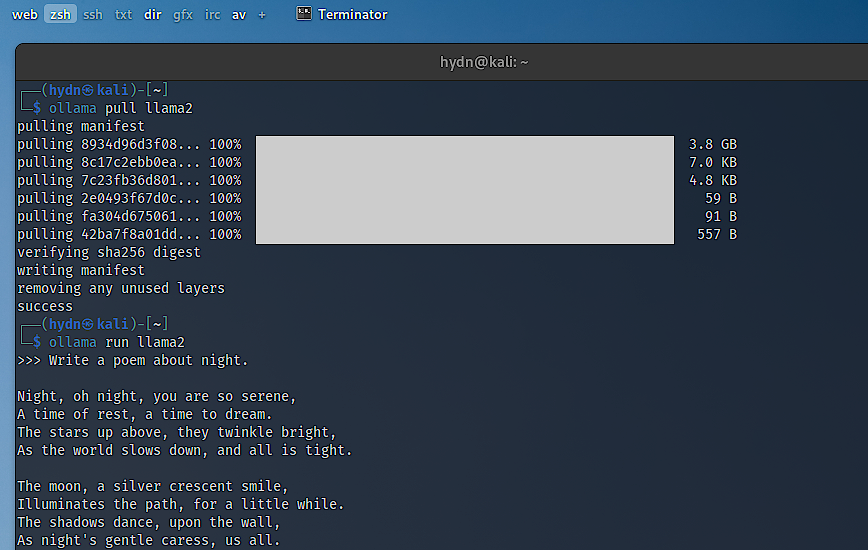
The shift towards Linux as the preferred operating system for artificial intelligence and machine learning development isn’t a sudden trend, but a logical outcome of its inherent strengths. In 2026, we’re seeing a clear move away from relying solely on cloud-based AI solutions, with more developers wanting the control and privacy of local development environments. This is where Linux shines.
A major factor is the increasing integration of AI directly into the Linux kernel itself. As highlighted in a recent YouTube video by SavvyNik (January 31, 2026), the kernel is now experimenting with AI tools to aid in code maintenance and review. This isn’t just about convenience; it’s about fundamentally optimizing the OS for AI workloads.
Beyond kernel-level support, Linux offers unparalleled flexibility. Developers can heavily customize the OS to precisely match their project’s needs. This level of control is difficult to achieve with other operating systems. The robust and active open-source community provides extensive documentation, readily available support, and a constant stream of new tools and libraries. This collaborative environment accelerates innovation.
The growing popularity of local AI development also plays a role. Running models locally offers benefits like reduced latency, increased data privacy, and the ability to work offline. Linux provides the ideal platform for these scenarios, offering the performance and control needed to run demanding AI applications efficiently.
package managers and distributions
Managing software on Linux relies on package managers, tools that automate the process of installing, updating, and removing programs. The specific package manager varies depending on the distribution you choose. `apt` is used on Debian and Ubuntu, `yum` or `dnf` on Fedora and CentOS, and `pacman` on Arch Linux. Learning to use your distribution’s package manager is the first step to building an AI development environment.
For AI development, several distributions stand out. Ubuntu is arguably the most popular choice, thanks to its large community, extensive documentation, and broad software availability. Fedora is favored by those who want to stay on the cutting edge, benefiting from its rapid release cycle and inclusion of the latest packages. However, this can sometimes mean less stability.
Debian is renowned for its stability, making it a solid option for production deployments. Arch Linux, while powerful and highly customizable, is best suited for experienced Linux users who are comfortable with a more hands-on approach. It requires more configuration but offers maximum control. Consider your experience level and project requirements when choosing a distribution.
Ubuntu is the safest bet for most people because of the community support. Fedora works if you need the newest kernels for hardware compatibility, while Debian is better for servers where you don't want things to change.
- Ubuntu has the largest community and the most available software packages.
- Fedora: Cutting edge, rapid release cycle, good for testing new features.
- Debian: Extremely stable, ideal for production environments.
- Arch Linux: Highly customizable, but requires significant technical expertise.
Linux Distributions for AI Development: A Comparative Overview (2026)
| Distribution | Ideal User Profile | Key Strength | Potential Consideration |
|---|---|---|---|
| Ubuntu | Beginner to Intermediate Developers | Extensive package availability and broad community support. | May require more configuration for highly specialized AI workflows. |
| Fedora | Developers prioritizing cutting-edge tools | Strong focus on incorporating the latest software and technologies. | Can be less stable than distributions with longer release cycles. |
| Debian | Users seeking a stable and reliable base | Excellent stability and a vast repository of software. | Package versions may be older compared to rolling-release distributions. |
| Arch Linux | Experienced Linux users desiring full control | Highly customizable and allows for a tailored AI development environment. | Requires significant technical expertise and ongoing maintenance. |
| Pop!_OS | AI/ML developers and gamers | Optimized for NVIDIA GPUs and includes pre-installed tools. | More opinionated than other distributions, potentially limiting customization. |
| Manjaro | Users wanting Arch benefits with easier setup | User-friendly access to Arch Linux's package ecosystem. | Can sometimes experience delays in package updates compared to Arch. |
Qualitative comparison based on the article research brief. Confirm current product details in the official docs before making implementation choices.
python and virtual environments
Python has become the de facto language for AI and machine learning. Its simple syntax, extensive libraries (like TensorFlow, PyTorch, and scikit-learn), and large community make it the natural choice for most AI projects. However, managing Python dependencies can quickly become a headache without proper tools.
This is where virtual environments come in. A virtual environment creates an isolated space for your project’s dependencies, preventing conflicts with other projects or system-wide packages. Using virtual environments is absolutely essential for any serious AI work. You can create them using either `venv` (built into Python) or `conda` (a package and environment manager).
To create a virtual environment with `venv`, navigate to your project directory in the terminal and run `python3 -m venv .venv`. This creates a directory named `.venv` (you can choose a different name) containing a self-contained Python installation. To activate the environment, run `source .venv/bin/activate` on Linux or macOS. You’ll know it’s active when you see the environment name in parentheses at the beginning of your terminal prompt.
Once activated, any packages you install using `pip` will be installed within the virtual environment, leaving your system Python installation untouched. When you’re finished working on the project, simply run `deactivate` to exit the environment. Conda offers similar functionality, but also manages non-Python dependencies, making it useful for projects with complex requirements.
- Create a venv using python3 -m venv .venv
- Activating a venv: `source .venv/bin/activate`
- Deactivating a venv: `deactivate`
Creating Virtual Environments for AI Development
Setting up isolated environments is crucial for AI development to avoid dependency conflicts between different projects. Linux provides two primary methods for creating virtual environments: Python's built-in venv module and the Conda package manager. Both approaches allow you to maintain separate Python installations with specific package versions for each project.
# Method 1: Using Python venv
# Create a virtual environment
python3 -m venv ml_env

# Activate the virtual environment
source ml_env/bin/activate

# Upgrade pip to latest version
pip install --upgrade pip

# Install common AI/ML libraries
pip install tensorflow
pip install torch torchvision torchaudio
pip install numpy pandas scikit-learn matplotlib jupyter

# Deactivate when done
deactivate

# Method 2: Using Conda
# Create a new conda environment with Python 3.11
conda create -n ml_env python=3.11

# Activate the conda environment
conda activate ml_env

# Install AI/ML packages using conda
conda install tensorflow
conda install pytorch torchvision torchaudio -c pytorch
conda install numpy pandas scikit-learn matplotlib jupyter

# Alternative: Install from conda-forge channel
conda install -c conda-forge tensorflow pytorch

# Deactivate when done
conda deactivate

# List all environments
conda env list

# Remove an environment if needed
conda env remove -n ml_env
The venv method uses Python's standard library and pip for package management, making it lightweight and suitable for most Python-based AI projects. Conda offers more comprehensive environment management, including non-Python dependencies and optimized package builds, which can be beneficial for complex machine learning workflows. Choose the method that best fits your project requirements and system setup. Remember to always activate your environment before installing packages or running your AI applications to ensure proper isolation.
gpu configuration with nvidia drivers
For most AI tasks, especially deep learning, a powerful GPU is crucial. NVIDIA GPUs are the industry standard, and configuring them correctly on Linux is a key step. Start by installing the latest NVIDIA drivers for your GPU. You can download them directly from the NVIDIA website, or use your distribution’s package manager. For example, on Ubuntu, you might use `apt install nvidia-driver-535`.
After installing the drivers, verify the installation by running `nvidia-smi`. This command should display information about your GPU, including its model, temperature, and memory usage. If the command fails, there may be an issue with the driver installation. Double-check that you’ve installed the correct driver for your GPU and kernel version.
CUDA (Compute Unified Device Architecture) is NVIDIA’s parallel computing platform and programming model. It allows you to leverage the power of your GPU for general-purpose computing tasks, including machine learning. cuDNN (CUDA Deep Neural Network library) is a GPU-accelerated library specifically optimized for deep learning applications. Both are essential for maximizing the performance of your AI models.
Installing CUDA and cuDNN typically involves downloading the appropriate versions from the NVIDIA developer website and following their installation instructions. Be sure to match the CUDA and cuDNN versions to your TensorFlow or PyTorch version for optimal compatibility. The NVIDIA documentation provides detailed guidance on the installation process.
- Install NVIDIA drivers: Via NVIDIA website or package manager (e.g., `apt install nvidia-driver-535`).
- Verify driver installation: `nvidia-smi`.
- Install CUDA: Download from NVIDIA developer website.
- Install cuDNN: Download from NVIDIA developer website (ensure version compatibility).
file management commands
AI projects often involve working with large datasets. Efficiently managing these files is critical. The `cp` command copies files (e.g., `cp data.csv backup.csv`). `mv` moves or renames files (e.g., `mv old_name.txt new_name.txt`). Be extremely careful with `rm`, which deletes files – there’s no undo! (e.g., `rm unwanted_file.txt`).
`tar` is used for archiving multiple files into a single file, often compressed. For example, `tar -czvf data.tar.gz data_directory` creates a compressed archive of the `data_directory`. `gzip` and `gunzip` compress and decompress individual files, respectively (e.g., `gzip large_file.txt`, `gunzip large_file.txt.gz`).
The `find` command is invaluable for locating files based on various criteria. For example, `find . -name '*.csv'` searches for all files with the `.csv` extension in the current directory and its subdirectories. You can combine `find` with other commands to perform actions on the found files, such as deleting or copying them.
When working with datasets, it’s good practice to organize your files logically and use descriptive names. Regularly back up your data to prevent accidental loss. Understanding these basic file commands will significantly improve your workflow and data management skills.
- `cp`: Copy files.
- `mv`: Move or rename files.
- `rm`: Delete files (use with caution!).
- `tar`: Archive files.
- `gzip/gunzip`: Compress/decompress files.
- `find`: Search for files.
process management for training
Training AI models can be resource-intensive and time-consuming. Monitoring and managing these processes is crucial. The `top` and `htop` commands provide a dynamic, real-time view of system processes, showing CPU usage, memory usage, and other key metrics. `htop` is often preferred for its more user-friendly interface.
`ps` provides a more static snapshot of running processes, allowing you to view detailed information about each process. You can combine `ps` with `grep` to filter the output and find specific processes (e.g., `ps aux | grep python`).
If a training job becomes unresponsive or consumes excessive resources, you may need to terminate it. The `kill` command sends a signal to a process, typically to terminate it. `pkill` allows you to terminate processes based on their name (e.g., `pkill python`). Again, exercise caution when using these commands.
To run training jobs in the background, use `nohup` and redirect the output to a file (e.g., `nohup python train.py > output.log 2>&1 &`). This allows the job to continue running even after you close the terminal. Tools like `screen` or `tmux` provide even more robust session management, allowing you to detach and reattach to terminal sessions.
- `top/htop`: Monitor system processes.
- `ps`: View process details.
- `kill/pkill`: Terminate processes (use with caution!).
- `nohup`: Run processes in the background.
Running Long-Running ML Training Jobs
Machine learning training jobs can run for hours or days, making it essential to run them in a way that survives terminal disconnections. Linux provides several robust methods to manage long-running processes, with nohup and screen being the most reliable options for AI development workflows.
# Method 1: Using nohup to run training script in background
nohup python train_model.py --epochs 100 --batch-size 32 > training.log 2>&1 &

# Check if the process is running
ps aux | grep train_model.py

# View the log file in real-time
tail -f training.log

# Method 2: Using screen for persistent sessions
# Create a new screen session
screen -S ml_training

# Inside the screen session, run your training script
python train_model.py --epochs 100 --batch-size 32

# Detach from screen session (Ctrl+A, then D)
# Or use: screen -d ml_training

# List active screen sessions
screen -ls

# Reattach to the session
screen -r ml_training

# Kill a screen session when done
screen -X -S ml_training quit
The nohup method is ideal for fire-and-forget training jobs where you want to capture all output to a log file. The ampersand (&) runs the process in the background, while 2>&1 redirects both standard output and error messages to the same log file. Screen sessions offer more flexibility, allowing you to detach and reattach to running processes, monitor progress interactively, and manage multiple training jobs simultaneously. Both approaches ensure your training continues even if your SSH connection drops or your terminal closes.
remote access and collaboration
SSH (Secure Shell) is the standard protocol for secure remote access to Linux systems. It allows you to connect to a remote server and execute commands as if you were sitting directly in front of it. You can connect using the `ssh` command followed by the username and server address (e.g., `ssh user@example.com`).
For increased security and convenience, set up SSH keys for passwordless login. This involves generating a key pair on your local machine and copying the public key to the remote server. Once configured, you can connect to the server without entering your password. This is especially useful for automated tasks.
Collaboration is essential in AI development. Git is a distributed version control system that allows you to track changes to your code and collaborate with others. Platforms like GitHub and GitLab provide online repositories for storing and managing your Git projects.
Using remote servers for training large models offers several advantages, including access to more powerful hardware and increased scalability. This is particularly important when dealing with massive datasets or computationally intensive models.
- SSH: Secure remote access.
- SSH Keys: Passwordless login.
- Git: Version control.
- GitHub/GitLab: Online repositories.


No comments yet. Be the first to share your thoughts!